Monday, July 23, 2012

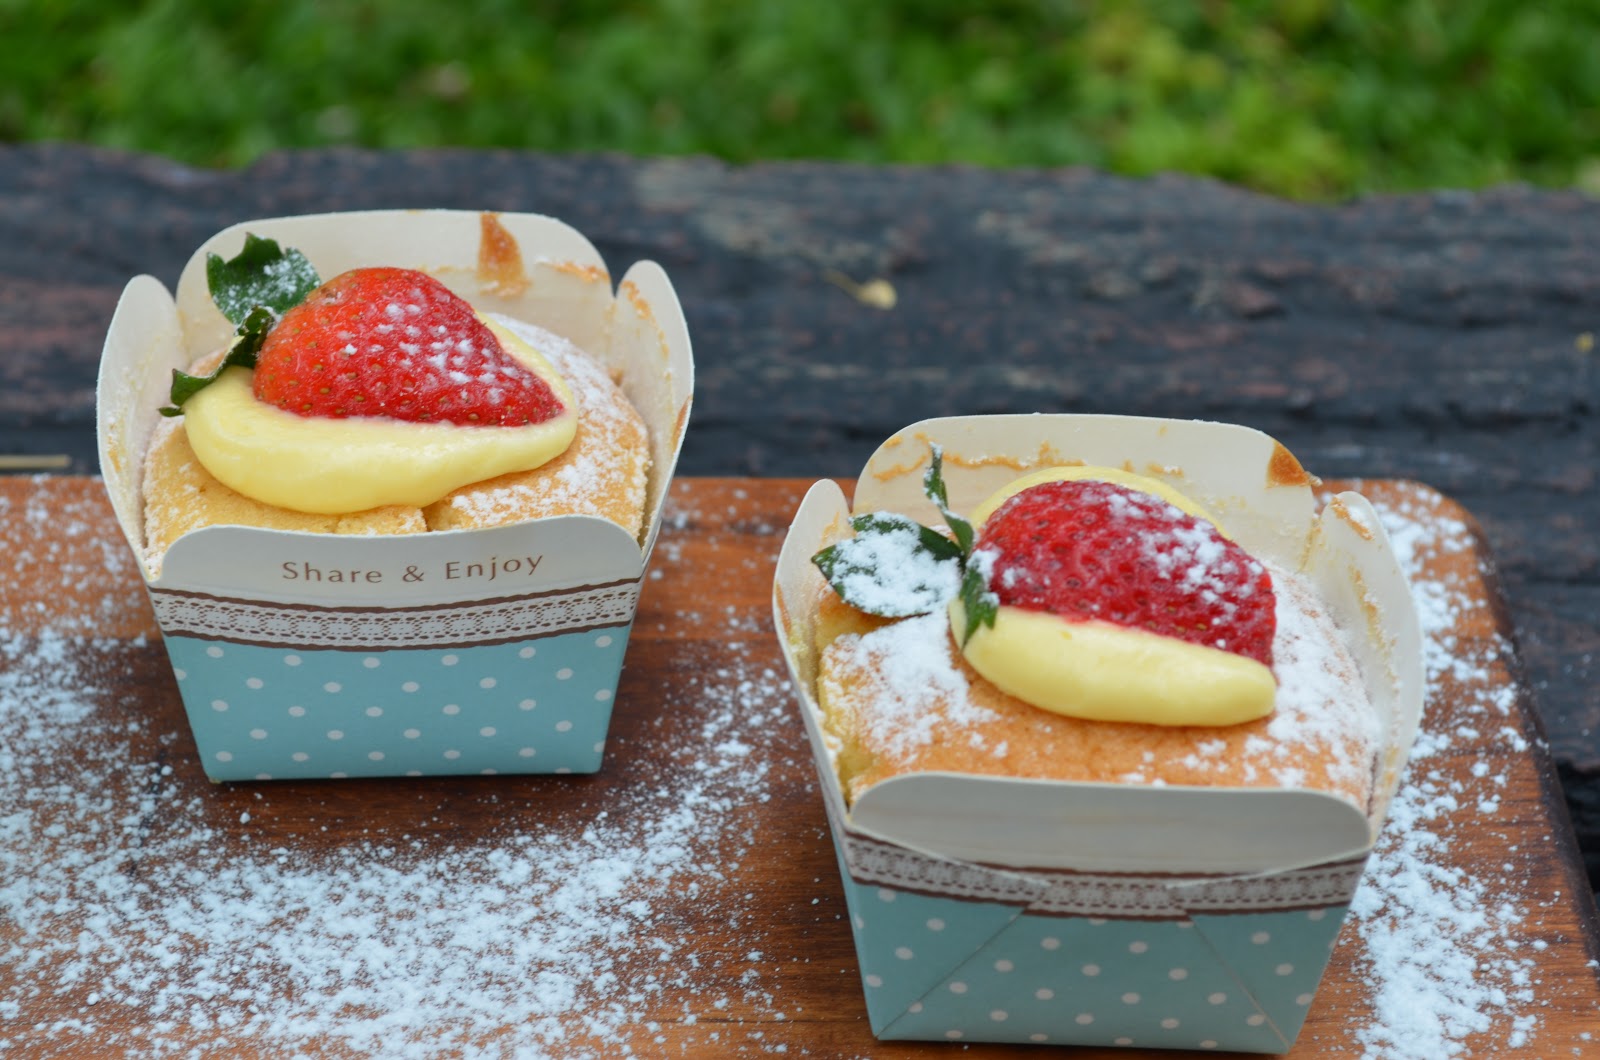
Hokkaido Chiffon Cupcakes with Custard filling

 I think I have fallen all over again!! This is one amazing, well almost prefect cake! I loved everything about this cake! Simple to make, cheap to make and the combination of the custard filling and cotton soft cake is perfect!! But.....It lacked flavouring! It had quite a strong eggy smell to it if you ate it alone. So I would probably add a teaspoon of vanilla extract to the cake.  The recipe only gave me 10 cupcakes which is quite sufficient because I have a very small extended family (with cousins' living next door), so 10 cupcakes was enough to feed all of it with no extras for the next day.  I also increased the amount of sugar in both cake and custard filling because I personally prefer my cakes 'sweet' (although most chiffon cakes are not meant to be 'sweet sweet',if you get what I mean). I felt the amount of sugar in the recipe was little.


Filled with custard filling inside.

Adapted from Nasilemaklover
Hokkaido Chiffon Cupcakes
(A)
3 large egg yolks
35g caster sugar (original amount-20g)
35g corn oil
60g fresh milk
70g cake flour

(B)
3 large egg whites
35g caster sugar (original amount-25g)

Custard Filling:
60g dairy whipping cream,chilled
30g caster sugar (original amount-10g)
2 teaspoon custard powder
Icing sugar for dusting
  1. Preheat oven at 170 C.
  2. Beat yolk and sugar until very pale. (This may take a while. I used my stand mixer and the quantity was quite little for the bowl so it took me about 10 minutes to get to that consistency.)
  3. Add corn oil & milk,mix until combined.
  4. Add cake flour and mix at the lowest speed until combined.
  5. In another bowl, beat egg whites until foamy. Add sugar gradually and continue to beat until soft-medium peak.
  6. Take 1/4 of the meringue and mix into the batter to loosen up the mixture.Add the cake batter into the remaining meringue mixture and fold until well combined with a spatula. Divide batter equally (making sure the cupcake liners are fill max 3/4 full) into cupcake liners. ( I got 10 cupcakes from the batter)
  7. Bake for 20-25 minutes. 
  8. Remove from oven and allow to cool.
  9. Prepare filling while baking cupcakes. Place all custard filling ingredients in a bowl and whip until stiff. Place a clingwrap tightly (plastic touching the surface of the custard filling) over the custard filling and chill.
  10. Once cupcakes are cool completely, pipe filling into cupcakes. ( Pierce through the cupcakes with the nozzle and pipe.)
  11. Chill before serving.


Friday, July 20, 2012

Super vanilla Funfetti cupcakes with vanilla frosting

I made my own birthday cake this year because dad was vegetarian and personalised cakes can be very expensive these days. Dad insisted I had a small cake for him ( which he didn't eat at all besides feeding of cake time,he ate only the frosting!). It was more of my dad wanting to celebrate my birthday. I felt old celebrating my birthday party. I would have preferred having a quiet good dinner outside than have a party.

Anyway, the vegetarian orange cake was quite a disappointment to me, I almost gave up on the cake but I had no choice but to have it because it was pretty last minute to get a vegetarian cake somewhere. I learnt my lesson never to try a new recipe I am not sure of for a party or large crowd. I frosted the cake anyway with chocolate cream cheese frosting which was pretty tasty. It would have been great if the cake turned out well too.

I want to share the funfetti cupcake with buttercream frosting recipe and exclude the main cake all together because it was a major flop!

Here's the recipe from sweetapolita
I adapted the recipe slightly. The following is my variation:
I used:
  1. FOR THE CAKE- 1/2 cup egg whites.
  2. Instead of 6 tablespoons of unsalted butter & vegetable shortening each, I used all butter,salted and omitted the salt.
  3. FOR THE FROSTING - I used salted butter and omitted the salt
  4. Milk was not used because the weather in Malaysia was so hot, my frosting was soft already, adding milk might make the frosting softer.
  5. I decorated the cupcakes with fresh blackberries and raspberries instead of coloured sprinkles. 

My 23rd Birthday cake
Fun fetti inspired cupcakes
Frosted with vanilla buttercream and fresh blackberries and raspberries


Chocolate & Raspberry cake

I thought I should finally open up my Callebaut semi sweet chocolate pistols. I have always loved Lindt eating/couverture chocolates for my desserts but after reading so much about 'good quality' couverture chocolates like Callebaut and Valhorna; I decided to look for one of the two brands. Most Malaysians are ignorant to the fact that chocolate's number one enemy is the fridge. I stumbled upon callebaut chocolate in KL selling for RM 128 for a bag of 2.5kgs.Pretty cheap but it was kept in the fridge/chiller. I had a pretty bad experience with my chocolates kept in the chiller which was accidentally switched to freezer mode. My chocolates seized no matter how many times I started a new batch of chocolates to melt. I learnt my lesson.

I am not a fan of chocolates,call me weird but I am more into sponge/chiffon cakes.Not much of a rich cake/desserts/pastry person although I love making anything sweet which involves the oven.Anyway, I tried a new recipe using chocolates and fruits. I always like my chocolate desserts plain. I wanted to try something new and thought it would be a good idea to start off with raspberries (my favourite berry) and chocolate. The recipe turned out pretty well. Because my cake came out of the oven with a dome, I had to cut the top off. I left the crumbles and crust on plate on the table and continued. Dad walks into the kitchen and pinches on the cake 'scraps', smiles and asks my cousin to have a taste of it. My cousin had a pinch of it and next thing I knew the cake 'scraps' were all gone with the help of her brother as well,of course! They ate the cake 'scraps' with generous amounts of leftover ganache spreading on the bits like having bread and jam!  How cute! I took that as a compliment. :-) ( I was,honestly, gonna throw the cake 'scraps' away,LOL!)


Here's the recipe:

Sponge cake:
145g butter
240g caster sugar
150g good quality dark chocolate pistols, I used Callebaut 53% cocoa
6 large eggs,separated
120g cake flour , sift twice
23g cocoa powder, sift twice

Ganache:
450g good quality dark chocolate pistols
360ml whipping cream, 35% fat
110g butter,softened & cubed

Raspberry jam
Fresh raspberries

  1. Make ganache an hour before baking your cake.
  2. Heat cream in a small saucepan until simmering,make sure not boiling.In another bowl,place chocolates.Pour the hot cream into chocolate and stir gently until chocolate is fully melted.
  3. Stir continuously until mixture is slightly cooled, add half of the butter. And continue to stir. Add the remaining butter,mix until you get a smooth ganache. Cover the ganache with plastic wrap ( plastic wrap should touch surface of ganache) and chill in fridge for 2-3 hours.
  4. Line a 9 inch round pan with baking paper.Preheat oven at 175 C.
  5. Melt butter in microwave until hot and pour into bowl with chocolate. Stir the chocolate mixture until smooth. Whisk 165g of the sugar with egg yolks until pale and fluffy; fold in chocolate mixture. 
  6. Fold in flours until fully combined.
  7. In another bowl, make meringue. Whisk egg whites until soft peaks, gradually add sugar and continue to mix until stiff peaks.
  8. Add 1/3 of the meringue into cake batter and mix until combine then fold in the remaining meringue mixture in two batches until combined.
  9. Pour batter into prepared tin. Drop the baking tin on a hard surface to knock the large bubbles out. Bake for 45-55 minutes or until a cake tester comes out clean.
  10. Allow to cool for 1-2 hours.Peel liners off the cake.Cut the cake into three slices using a serrated knife. Level the cake on top if it's uneven on the surface.
  11. Take ganache out of the fridge and remove the plastic wrap. If ganache is still in a runny like,place it back into the fridge until it is a spreadable consistency.
  12. If too stiff, leave it out a few minutes in a warm area until it is a spreadable consistency.
  13. To assemble, Place one slice of cake on a turntable and spread a thin layer of raspberry jam. Then add a moderate layer of ganache and spread to even out. Place fresh raspberries on top and cover with another layer of cake. Do the same with the next layer. Finally frost the layered cake with ganache; on top and on the sides.
It's okay if the top has cracks because we are going to cut the top off
Making the ganache
                                   

Raspberry jam,raspberries,chocolate ganache to filling and frost the cake
                                   

Raspberries I bought at hefty price in Jason Foodhall and I mean it! RM 27 is no joke. I bought the same ones at Isetan Foodhall in KLCC for only RM 22.

Spread the jam,ganache and topped with raspberries

Frosted cake

Still need to work on my photography skills


Saturday, July 14, 2012

Durian chiffon roll

  It's been ages since I updated my blog because I have been lazy and also busy with uni,moving back and settling down. All is done, now I am free to update. I got my results yesterday and I am proud to announce that I will finally graduate!!!woo hooo. I will definitely miss Sydney though but then again, home is home. I am still trying to adjust myself back here in Malaysia because things have changed since I left 4.5 years ago. Suddenly I feel like a Sydneysider,lol. I miss the winter and actually prefer the cold compared to the heat in Malaysia. It's an absolute nightmare. Safety in Malaysia is getting from bad to worse etc. I have baked quite a lot over the few months/weeks that I have been missing but never had the time to take proper pictures. Lately, I have had this huge obsession over chiffon cakes and sponge cakes so I have been spending time 'collecting' recipes over the internet from Chinese and Indonesian websites. The Chinese, Japanese & Indonesians have their own versions of chiffon and sponge cakes. So far, the Indonesian recipes have worked well for me. Will have to practice on the Chinese and Japanese ones as well. I prefer chiffon cakes over sponge cakes because I feel sponge cakes are little drier compared to chiffon cakes, I may be wrong but from what I have made and eaten, Chiffon cakes are moist,fluffy, light like eating cotton cakes. 

My perfect chiffon roll, 2nd attempt in making it in 24hours.
Yesterday's distorted durian chiffon roll. It  somehow had cracks when I rolled it . So when I sliced it , the slices turned out like the ones in the picture below. I had to chill it for another 2-3 hours to be able to slice perfect slices.

I adapted the cake slightly from here and made my own durian filling

Chiffon roll:
(A)
5 egg yolks
60g caster sugar
75ml oil
100ml milk
1 teaspoon vanilla extract
125g cake flour

(B)
5 egg whites
1/2 teaspoon salt
80g caster sugar
1/2 teaspoon cream of tartar

Durian filling: (make this ahead of time and place in the fridge to chill)
1 teaspoon gelatin powder
5 teaspoon water
125g durian flesh
150ml whipping cream
50g icing sugar


  1. Durian filling - Mix gelatin and water. Warm mixture in the microwave for 1-2 minutes to dissolve the gelatin. It should be just warm not hot.Allow to cool completely (defrost setting) 
  2. Blend the durian flesh until smooth.
  3. Whip the cream, sugar, and gelatin mixture until stiff peaks. Fold in durian puree. Chill
  4. Chiffon roll -Grease and line a 30x30 cm pan. Preheat oven at 180C.
  5. (A) Whisk yolks,vanilla extract and sugar until very thick,pale and fluffy ( Ribbon stage) about 10minutes. Add milk,oil and flour and continue mixing until well combined.
  6. (B) In another bowl, whisk egg whites until frothy then add salt and cream of tartar. Add sugar gradually until stiff peaks.
  7. Take 1/4 of the meringue and mix in (A). Then pour the batter into (B) and fold until well combined.
  8. Pour batter into a prepared tin and level the batter evenly in the tin.
  9. Bake for 15 minutes.
  10. Remove from oven,run a sharp knife through the sides of the tin and turn the cake on a cooling rack. Allow it to cool slightly before using a new baking paper to roll the unfilled chiffon sheet, leave it for a few mins (less than 5 mins) before unrolling it back. Let it cool completely before spreading the durian filling evenly on top, because not to over spread the filling on the chiffon sheet, carefully roll it back again and chill for 2-3 hours. Slice the sides off and then slice generous slices for yourself to enjoy! =)


Wednesday, April 25, 2012

Strawberry & Lemon cupcakes

I finally got the opportunity to go to Donna Hay's store in Sydney. A friend of my aunty's was down in Sydney and my aunty took time off to take her friend around Sydney and one of the places was Bondi Beach so on the way I asked her if we could go to Donna Hay's store which is close to Bondi  for a quick look and get a novelty ornamental cooling rack from the store. We had a pit stop at Sydney Fish Market for lunch before heading to Woollahra then Bondi. It was a small boutique like store with everything so dainty,pretty & pastel-ish but very pricey. The cooling rack priced at $ 39.95 was so tiny that it could only fit a 6-7 inch cake. I obviously didn't buy it although I was very much tempted to. I got a couple of polka dot cupcake liners,Donna Hay's signature cupcake liners and Callebaut cocoa chocolate. I wanted to get a novelty item but the prices were so expensive but it was a good stop. If I was working I would be heading down to her store quite often!

I made strawberry cupcakes a couple of time and they never turned out well. They were no doubt delicious and moist but they sunk terribly in the middle and also the strawberries sunk to the bottom. So I tried the recipe a couple of times using different ways but somehow all it sunk everytime. I love the flavours tho so I had to look for another recipe with a similar ingredients.

It was a chaos at my aunt's place earlier because my aunt and I were arguing on how to frost the cupcakes. We did not have enough strawberries for garnishing so she took out a packet of cherries to top on the cupcakes,aiyoh! but I wanted the cupcakes to look more boutique baking style. Before allowing me to pipe the frosting, she wanted to use a tiny star tip nozzle to pipe the cupcakes, I refused to follow because it will definitely look kiddish. Anyway, we had a good time arguing/debating on how to decorate the cupcakes.

Strawberry & Lemon cupcakes:
Adapted from annies-eats

2 1/4 cups plain flour
1 1/2 teaspoon baking powder
3/4 teaspoon salt
zest of two medium size lemons
150g unsalted butter, at room temperature
1 1/2 cups caster sugar
1 tablespoon vanilla dusting powder
2 eggs
3/4 cup milk, at room temperature
2 tablespoon sour cream
250g strawberries, coarsely chopped
Juice of a lemon

Method
  1. Place strawberries, lemon juice & 3 tablespoon of sugar in a bowl and mix until strawberries are well coated. Leave to stand for 15minutes.
  2. Preheat oven at 180 C. Line cupcake pans with paper liners.
  3. In a bowl combine the dry ingredients, (Plain flour, baking powder & salt). Mix them with a whisk.Set aside.
  4. Beat butter on medium speed until pale, & fluffy.Add the remaining sugar and vanilla dusting powder and beat until well combined.
  5. Beat eggs one at a time, scraping the sides of the bowl after each addition. 
  6. Add half of the dry ingredients in and beat on low speed until incorporated. Then add in the all the milk,sour cream & lemon zest.Mix until smooth. Fold in the remaining dry ingredient until combined.
  7. Fold the strawberry mixture with a spatula.
  8. Divide the batter evenly into the prepared muffin pan,filling them to about 1/2- 2/3 full. I normally scoop a big dollop of batter into the muffin pan holes using the spoons we use for eating.
  9. Bake for 20-25minutes until a toothpick/cake tester inserted in the center comes out clean. Check cupcakes at 20minutes, you don't want to overbake the cupcakes. Allow to cool in the pan for 5minutes then transfer to a cooling rack to cool completely.
Cream cheese frosting:

250g cream cheese, at room temperature
150g unsalted butter, at room temperature
165g icing sugar,sifted

  1. Beat the cream cheese and butter until smooth and fluffy.( beat at a medium speed for 5-10minutes) Then gradually add the icing sugar until well combined.
For decoration:
Strawberries, sliced into half
Lemon Slices

To Frost:
Place cheese cream frosting in a pipping bag with a plain nozzle and frost. Then decorate with a slice of strawberry & lemon.


Saturday, April 21, 2012

Lemon macarons with boysenberries compote buttercream

This is one of the few recipes I baked the other day over at my aunt's place. I would not have been able to do this alone cause it's quite tedious and aunty has been asking me to make macarons with her since we did our macaron masterclass last year June! I made another macaron recipe as well but there were not many good pictures of it. Because macarons can be tooth-aching sweet, I made my own mix and match of filling to suit the palates of everyone around me.

I honestly couldn't eat my macarons after baking it and filling it with the buttercream cause I have been popping a few macaron shells in my mouth,obviously the distorted ones,so you can imagine how many distorted one were there!LOL. The balance of sour and sweet of the macarons and buttercream/filling made it less sweet sickening.

I have been purchasing a lot of kitchenware over the internet for my new kitchen back in Malaysia. I can't wait! I really can't wait to get my things organised and less headache with my maid keeping things everything everywhere.At the moment my kitchenware are all over the place-in the store room,in the wet kitchen and also my bedroom!I have a whole suitcase of kitchenware brought from Australia,Italy and Sri Lanka yet be to unpacked.
Macaron shells:
T-P-T mixture (almond mixture)
300g sifted almond meal
300g sifted icing sugar
110 aged egg whites
A pinch of salt
Lemon zest
Lemon yellow food colouring

Meringue                    
110 aged egg whites
½  teaspoon cream of tartar
300g sugar
75g water

1.       Mix sifted almond meal and icing sugar together until combined with a whisk.
2.      Then add the egg whites, salt, lemon zest and food colouring. Leave it aside.
3.      Using a candy thermometer, cook sugar syrup (sugar + water) until it reaches 118 C.
4.      When the syrup reaches 110 C, whisk the egg whites and cream of tartar until soft-medium peaks (in medium speed).
5.       When the syrup reaches 118 C ,with the mixer still whisking the egg whites (in medium speed), gradually add pour the sugar syrup. Then turn up the speed of the mixer for about 2 minutes until it turns glossy and slightly stiff and temperature of meringue has slightly cooled.
6.      Now, add in about ¼ of the meringue into the almond mixture to lighten the TPT mixture and well combined.
7.       Then FOLD IN the balance of meringue mixture in batches slowly until all is well combined. Mixture should be shiny.Do not overbeat your mixture.
8.      Scoop batter into a pastry/piping bag fitted with 10mm plain nozzle. Pipe onto your prepared trays. (Trays with a macaron shell template underneath parchment paper or silpat.) Let it rest until a ‘skin’ forms on top or when you touch the top of the macaron shell,it’s dry and does not stick to your fingers.In humid weather under an air conditioner around 15-30 minutes, if not 10minutes would be sufficient but it really depends on the weather. Decorate as desired before baking in a preheated oven of 170 C conventional or 150 C for fan forced ovens for 15 minutes. Open & close the oven door twice during baking time.


9.      When it’s baked, remove from the oven and let it cool on a rack. Once it’s completely cool. It should be able to peel off easily, pair them with similar sizes.

NOTE:
Some ovens has an auto switch off when the door opens so opening and closing the oven door twice is recommended but if your oven is an old oven which does not have an auto switch when you open the door, leave the oven door slightly ajar (not too much) when baking to allow the steam to escape. You really need to know your oven for macarons. Do a trial and error sheet of macarons before baking all the macarons shells if unsure.

Boysenberry buttercream

Boysenberries compote
100g frozen boysenberries, defrosted whole
1 tbsp caster sugar
1 tablespoon lemon juice

1.       Pat dry the defrosted boysenberries with a paper towel.
2.      Cook the boysenberries with sugar until juice oozes out but not mushy.
3.      Turn off the heat and pour the lemon juice in and mix until combined.
4.     Let it cool completely before mixing it with the buttercream.

Swiss meringue buttercream
1/2 cup (100gr) sugar

2 large egg whites
1 1/2 sticks (6 ounces) unsalted butter, at room temperature


Put the sugar and egg whites in a large heatproof bowl over a saucepan of simmering water and whisk constantly, keeping the mixture over the heat, until it feels hot to the touch, about 3 minutes. The sugar should be dissolved, and the mixture will look like marshmallow cream. Pour the mixture into the bowl of a stand mixer fitted with the whisk attachment and beat the meringue on medium speed until it cools and forms a thick shiny meringue, about 5 minutes. Switch to the paddle attachment and add the butter, one tablespoon at a time, beating until smooth. Once all the butter is in, beat in the buttercream on medium-high speed until it is thick and very smooth, 6-10 minutes.

To make the boysenberries compote buttercream:
Mix the completely cooled boysenberries compote into swiss meringue buttercream  until well combined.
To assemble:
Pair them with similar sizes. Pipe or spoon the filling in the size of a 20cent coin or about a big tablespoon into the centre of  one macaron shell then top and twist slightly with another macaron shell. Place them in the refrigerator overnight before eating


Adapted from Pierre Hermes:Macarons and also here

Wednesday, April 18, 2012

Boysenberries Friand

I know it's been ages since I updated my blog! I have been so busy with assignments and last weekend I went for my first ever diving lesson. It was scary because the water was freezing and inhaling and exhaling only through your mouth was something so unusual. I have been baking over the few weeks that I have been missing but they didn't look pretty to blog about but they were delicious no doubt. I will try to make them again when I am back in Malaysia in June and blog about it. At the moment I am tied down with uni work that I have no time for anything including blogging. It's my final semester and I can't wait to graduate! Anyway yesterday I went over to my aunt's place to do some baking because I don't have a stand mixer here at mum's place. Macarons has been on my bake list since I bought the Mastrad macaron sheets from Victoria Basement for only $ 17! That's a steal! I bought both sizes, the regular small ridges one and the larger size ones suitable for Isphan macarons.Will blog about them and the other things I bought from VB and Kitchenware Direct.com

Taken from Bisous et Toi but slightly adapted.

6 egg whites
155g unsalted butter, melted
2tbsp milk, I used double cream
180g almond meal
240g home-made vanilla icing sugar,sifted ( original recipe is 240 g icing sugar + 1 tsp vanilla extract)
75g self raising flour
12-15 frozen boysenberries or whatever berries you prefer. If small berries you will need more.
almonds for sprinkling on top
vanilla dusting sugar for topping

  1. Preheat oven at 180 C. Grease friand moulds generously with butter.
  2. Place egg whites in mixing bowl and whisk until frothy. Add cream/milk, melted butter, extract if using, sifted vanilla icing sugar, almond meal and flour, mix until combined. Scoop batter into individual pan until the mould is filled 3/4 full, top with berries then sprinkle with almond flakes generously.
  3. Bake for 12-15 mins, remove from oven, let it cool before removing from the moulds carefully.

  4. Dust with dusting sugar before serving.