Thursday, January 24, 2013

Toffee cake with toffee buttercream

It was my cousin's 16th Birthday and a good friend's birthday last week. One on Wednesday and another on a Saturday. 

Initial plan was to a cake for my cousin and cupcakes for my friend but since my cousin, Saras had plans made earlier I only gave three slices for ate the rest! Pretty greedy. And as for the cupcakes plan, my friend wasn't around so I cancelled my plans of making the cupcakes.
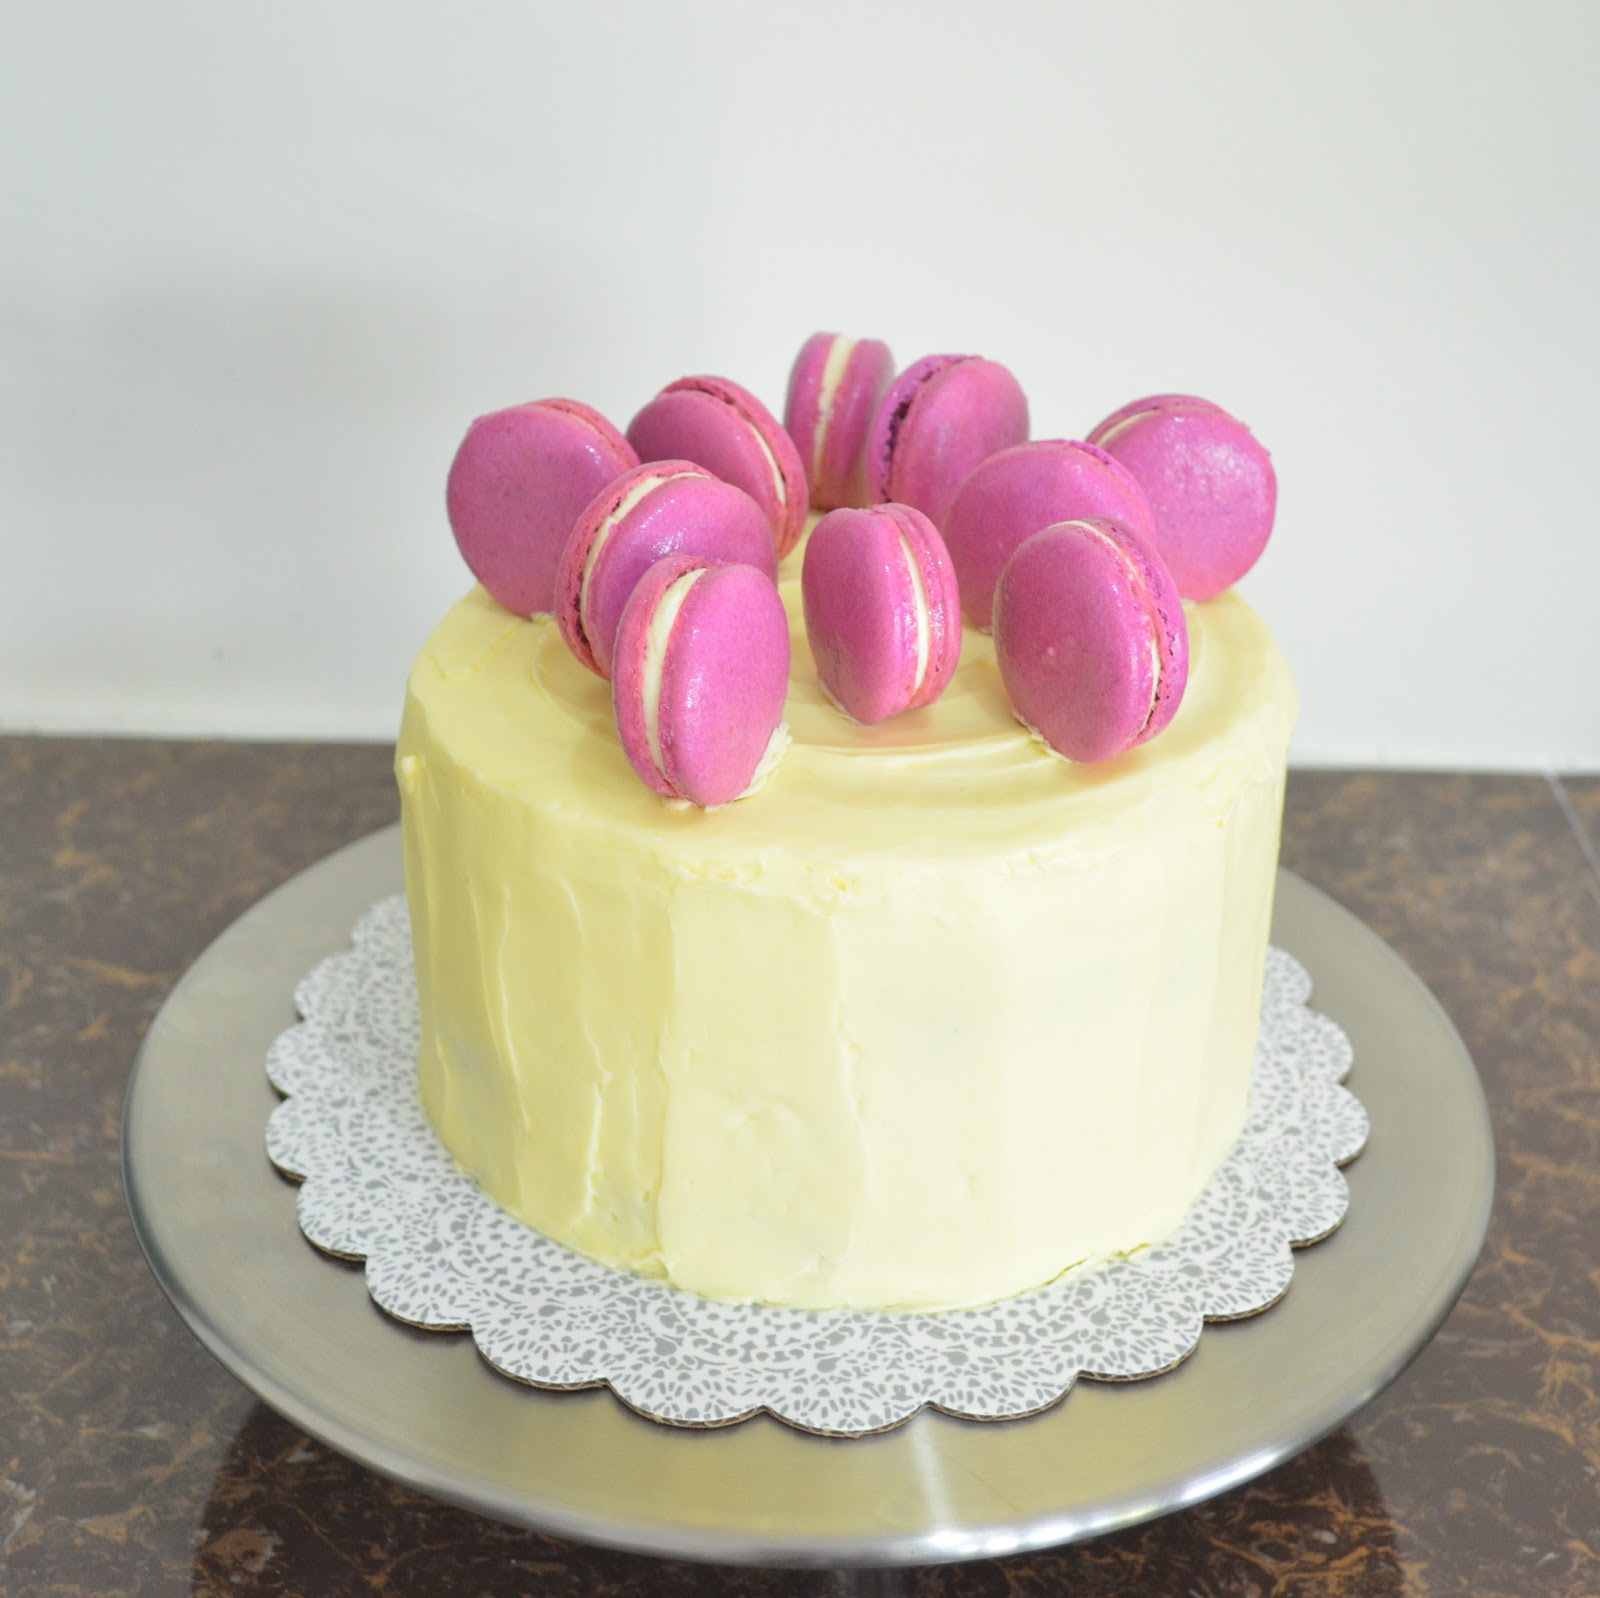
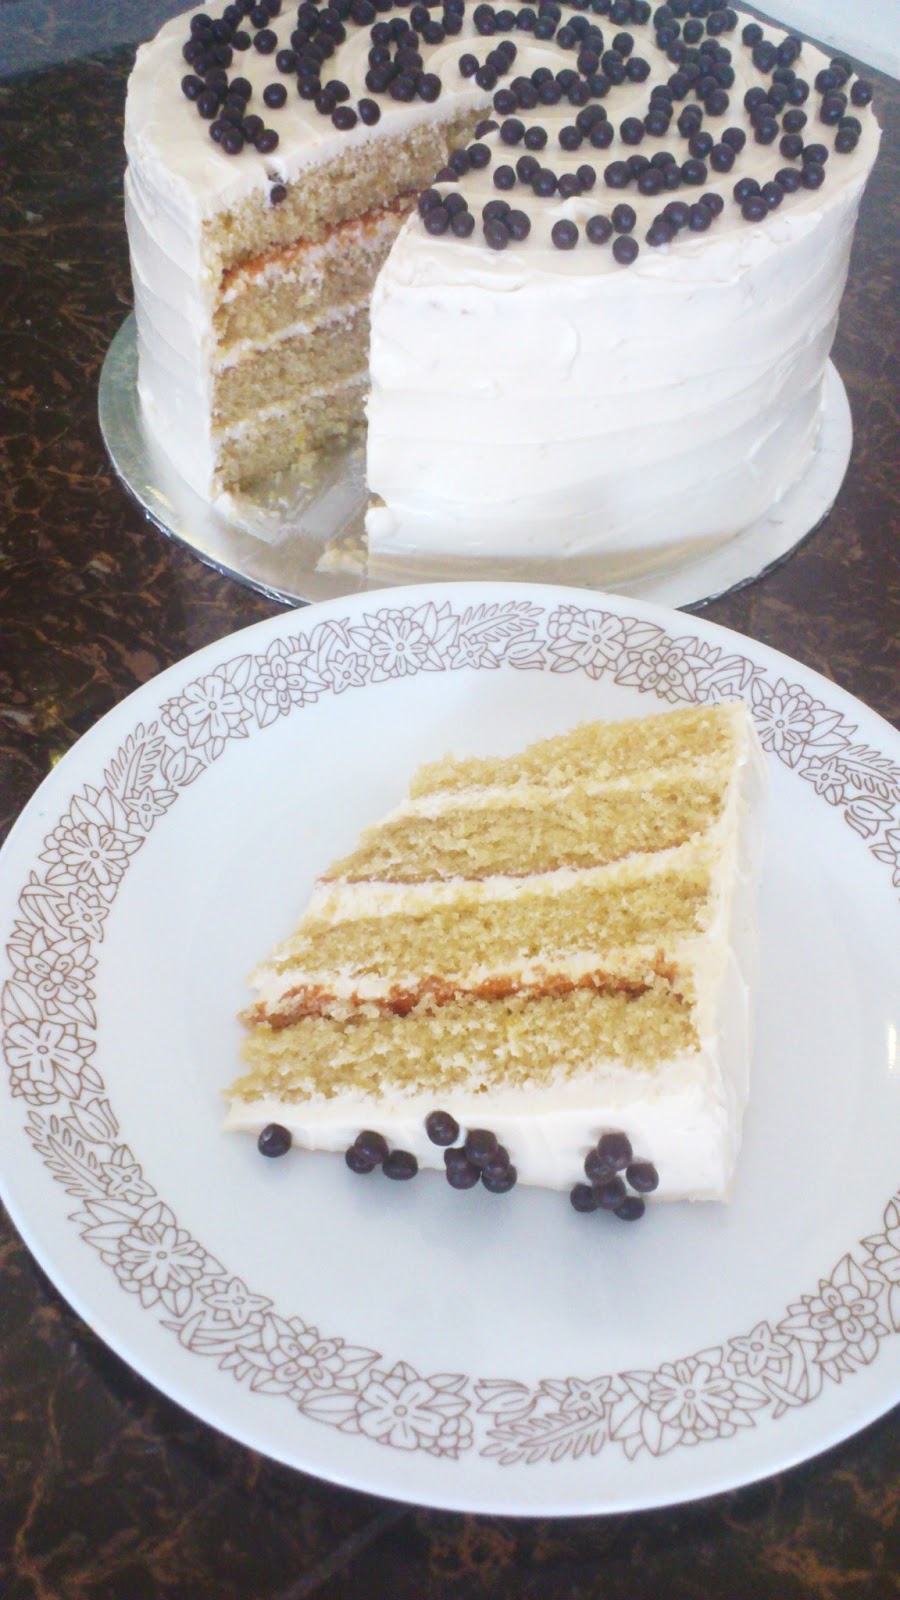
This beautiful cake has been on my wishlist to bake since I saw it. The recipe had crushed hazelnut candies on top but when I opened my packet of hazelnut and roasted it, it tasted rather bitter and didn't taste right. So I just followed my instinct and threw the whole batch of nuts away! :( I used Valhorna crunchy chocolate pearls as decoration and it tasted pretty good.

Another mishap I encountered while making my buttercream was I accidentally cut my finger with a very sharp knife and the finger was bleeding profusely. It was 12 midnight when I made the buttercream, no one was awake so I had to clean and dress the bloody wound by myself. Didn't make much difference cause the plaster kept coming off. Anyway, I manage to clean myself up and wear gloves to finish my cake. I couldn't just leave everything out at 12 midnight. But I enjoyed making the cake in the middle of the night. Pretty relaxing, quiet and cooling.

Anyway back to this wonderful cake.

Source : Rima from  Bisousatoi who got the recipe from Carrie of The Patterned Plate. Originally from The Birthday Cake Book by Fiona Cairns.

So here goes!
Toffee Cake:
280g unsalted butter, really soft
280g self raising flour
1 1/2 teaspoons baking powder
5 large eggs
160g golden caster sugar
120g light muscovado sugar, I couldn't find my carton of it so I substituted it with regular light brown sugar
1 teaspoon vanilla extract

Note: 
I was lazy so I used two 8 inch round baking pans and sliced the into half horizontally with a serrated knife giving me a four layer cake.Baked for about 30-40 minutes.

  1. Preheat oven to 180 C. Butter and line the bottoms of three 8inch round baking pans.
  2. Sift flour and baking powder in a large bowl/stand mixer bowl and put all the other ingredients in. Beat for a couple of minutes until you have a smooth batter.
  3. Divide batter equally into the three prepared pans and bake for 15- 20 minutes.
  4. The cake is ready when it's well risen, golden and a skewer placed in the middle comes out clean. Turn out of the tin after a few minutes then leave on a cooling rack to cool completely
Toffee Buttercream:
Toffee sauce:
80g unsalted butter
60g light brown sugar
2 tablespoons glucose
1 teaspoon vanilla extract
1 tablespoon cream
  1. Put butter,sugar and glucose in a saucepan over low heat and cook until it turns a deep amber colour. 
  2. Remove from heat and add cream and extract while stirring continously. 
  3. Leave it aside to cool completely.

Swiss meringue buttercream:
150g egg whites
250g caster sugar
290g unsalted butter, slightly softened

  1. In heatproof bowl, place egg whites and caster sugar over a pot of water over medium heat.( Double boiler) Whisk occasionally until sugar as completely dissolved.This may take a while.
  2. Using hand held or stand mixer, whisk the mixture on medium-high speed until mixture becomes marshmallowy and cooled down.
  3. Touch meringue to feel the temperature. 
  4. Add butter cubes,one at a time,and mixing it well after each addition. 
  5. If mixture looks runny, Place in the fridge for about 15-30minutes, depending on how warm the meringue is.Remove from fridge and continue to beat until you get a nice creamy mixture. 
  6. If mixture looks good, just continue mixing until you get a creamy mixture, it may look curdled in the beginning but it will start looking better as you continue beating.
  7. Add toffee sauce and give it a good quick whip.


Last but not least, Happy Sweet 16, Saras & Happy 26th, Jegan!!!!! <3

Saturday, December 29, 2012

Blue ombre layer cake with white chocolate and rose buttercream

So I decided to make another cake over the weekend for my father since the first one was a complete disaster with the help of my cousin, of course, who just completed her PMR and she got straight As!! So proud of her!! Congratulations Saras!!!!


My proud achievement!
For the first time after God knows how many attempts of macarons, my macarons have turned out well!!!

It was definitely a very beautiful cake and it tasted very good as well. I love the combination of white chocolate and rose. Only thing I would not do again is putting too much colouring to the cake cause the bottom layer cake tasted pretty bad compared to the first layer.

White chocolate cake:
2 cups cake flour
1 cup plain flour
1 tablespoon baking powder
1 teaspoon baking soda
a big pinch salt
250g unsalted butter
1 3/4 cups + 3tablespoons caster sugar 
1 teaspoon vanilla extract
1 large egg
1 1/4 cups ice cold water
100g white chocolate, melted & cooled
3 large egg whites, room temperature

Food colouring of your choice, I used Royal Blue from Americolor

  1. Beat butter and 1 3/4 cups of sugar for 10 minutes until very light and fluffy.
  2. Add egg and vanilla extract.Mix well.
  3. Add melted chocolate and continue mixing. 
  4. Alternate the dry ingredients and cold water until well combined. 
  5. In a different bowl, whisk egg whites until frothy. Gradually add the remaining 3 tablespoons of sugar in three batches until Soft peaks.
  6. Fold into the cake batter.
  7. If you want to make a 4 stack cake with different colours like I did, weigh the cake batter equally and squeeze the desired amount of colouring into your cake batter. 
  8. Pour cake batter into 3-4 8 inch round pans line and grease with butter and parchment paper.
  9. Bake for 30-45 minutes in a preheated oven of 180 C. 
  10. Half way through baking time, if browning too quickly, cover cake with aluminium foil.
  11. Remove from oven and allow cakes to cool completely in baking pan before removing it. 
  12. Wrap with clingwrap and place layers in fridge overnight.

White chocolate & Rose swiss meringue buttercream:
300g egg whites
500g caster sugar
600 - 700g unsalted butter,chilled cubes
1 1/2 teaspoons rose essence
200g white chocolate, melted & cooled
  1. Melt chocolate over double boiler and allow to cool completely.
  2. In heatproof bowl, place egg whites and caster sugar over a pot of water over medium heat.( Double boiler) Whisk occasionally until sugar as completely dissolved.This may take a while.
  3. Using hand held or stand mixer, whisk the mixture on medium-high speed until mixture becomes marshmallowy and cooled down.
  4. Touch meringue to feel the temperature. 
  5. Add butter cubes,one at a time,and mixing it well after each addition. 
  6. If mixture looks runny, Place in the fridge for about 15-30minutes, depending on how warm the meringue is.Remove from fridge and continue to beat until you get a nice creamy mixture. 
  7. If mixture looks good, just continue mixing until you get a creamy mixture, it may look curdled in the beginning but it will start looking better as you continue beating.
  8. Add cooled white chocolate and rose essence.Give it a good quick whip again.

Macaron shells:
80g sifted almond meal
100g icing sugar

80g egg whites
65g caster sugar

Food colouring of your choice
  1. Prepare baking trays with parchment paper or silpat with macaron template sheet underneath.
  2. Preheat oven to 160 Celcius.
  3. Mix egg whites and caster in a bowl and place the bowl over a pot of simmering water(double boiler method) until sugar is melted and the mixture is really hot. Make sure you continuously stir the mixture. Temperature approx 50-55 Celcius.
  4. Remove from heat and using a stand mixer or hand held mixer, whisk mixture until medium peaks and slightly cooled down. Don't over beat the mixture. If you have accidentally over beat the mixture, you will have to throw it away and start all over again. (Speaking from experience. LOL!!)
  5. Mix the sifted almond meal and icing sugar in a different bowl. Take a scoop of meringue and mix vigorously with the dry ingredients. Fold gently until combined the rest of the meringue in two batches.Make sure you have a shiny, glossy & slightly thicker than cake batter mixture.
  6. Scoop mixture in a disposable piping bag fitted with a 10mm plain nozzle. Pipe according to your macaron template and rap baking tray on a hard surface. Allow the surface of macaron to dry completely before baking it on the lowest rack for 15-20 minutes opening the oven door once during baking time.
  7. Allow to cool before removing macaron shells. Match the shells for piping.
For the filling:
I used the same buttercream I used for the cake.

Notes:
  • Air con dry it for 15-30 minutes.
  • Make sure meringue is glossy and shiny.
  • To prevent browning for coloured macaron shells, place an empty tray on the top shelf.
  • When baking, have another same size baking pan on the bottom on macarons' baking pan.

Assembling notes:
  1. I used about 1 1/2 cups of buttercream for each layer but I think 3/4 cup of buttercream is sufficient.
  2. I crumb coated my cake and kept it in the fridge overnight before doing the final touches. 
  3. The next day I found it difficult to frost the cake again cause the buttercream kept sliding off. I realised the crumb coat had condensation water on the cake so I carefully place a tissue to absorb the water. It worked. Then I did the final touches.
  4. Before placing the macarons on top,allow the cake to sit on the benchtop for a couple of minutes before arranging the macarons.

Layering

Crumb Coat done!

Had it crumb coated the night before.


The King of My Heart


I honestly wouldn't have done it without her!!! <3
<3


Sunday, December 23, 2012

Chocolate cupcakes with nutella cloud frosting

It was my dad's birthday past Tuesday and as a family affair. Unfortunately it was not a celebration we expected it be.my mousse cake turned out so bad I wanted to throw it away although everyone who ate it said it was delicious.luckily I had cupcakes to back up the disaster.but I am still not satisfied so I told dad I will make him another cake and I will stick to 'normal' cakes.

 So what went wrong to my caramel rum raisins mousse cake? :

 1. My gelatin didn't dissolve properly even after mixing it with hot liquid.jinx! So both layers of mousse didn't set!
 2. My caramel glaze was very jelly like,not sure if that was meant to like that but it happen.not much of a glaze.
 3. My small was shallow.no height at all.I thought it was alright but when I removed it from the ring,it was soo shallow.

 Anyway, the nutella cupcakes were a success minus the coffee maybe because I made a really thick coffee for it and therefore the cupcakes had a hint of bitterness to it. The cupcake batter wasn't enough to fill 24 mini cupcakes so I made another batch of cupcake batter but without coffee this time.I got about 40cupcakes altogether.as for the nutella frosting,I didn't have to double the amount up for two batches of cupcakes which was good.

I used the exact recipe I got from Rosie of Sweetapolita minus the coffee for one batch.I replaced it with boiled water.
Overall, I preferred the cupcakes without coffee.


The horrible birthday cake!:(


Monday, November 26, 2012

Chocolate soufflé with custard/vanilla ice cream

I am not sure if I've ever tried a soufflĂ© before but after eating a chocolate soufflĂ© today, I've officially fallen in love with it! It felt like I was having a hot chocolate mousse. 

Very light. Very simple. Very fast to make. You can also make it advance, pop into the fridge until it's time to serve dessert! Of course, you need to give yourself about 15-20 minutes to bake the soufflĂ©. It's dead simple,I promise. Requires only a few ingredients. And Taa daaa you've made a restaurant dessert! :)
The chocolate souffle sunk a little, so excuse the not to high soufflĂ©. 
I got exactly 7 soufflĂ©s from the recipe.


  • 340g good quality chocolate,I used half milk and half dark Callebaut chocolate,chopped
  • 1/2 cup heavy whipping cream
  • 2 large egg yolks
  • 210g (about 7 large egg whites) egg whites, room temperature
  • 2 tablespoons sugar


    1. Butter eight 3/4-cup soufflé dishes; sprinkle with sugar, tilting cups to coat completely and tapping out any excess. Arrange prepared soufflé dishes on large baking sheet.
    2. Combine chocolate and cream in large metal bowl. Set bowl over saucepan of barely simmering water and stir until chocolate is melted and mixture is smooth. Remove bowl from over water.
    3.  Stir egg yolks and salt into chocolate mixture. 
    4. Using electric mixer, beat egg whites in another large bowl until soft peaks form. Gradually add 2 tablespoons sugar, beating until semi-firm peaks form. 
    5. Using rubber spatula, fold 1/4 of beaten egg whites into chocolate mixture to lighten. Fold remaining egg whites into chocolate mixture in 2 additions. 
    6. Divide chocolate mixture among prepared soufflé dishes, filling dishes completely.
    7. Bake in a preheat oven of 180 C for 15 minute, at room temperature and 18 minutes if chilled or until the top feels firm and soufflĂ© puffs up.
    8. Serve immediately with custard/ice cream/whipped cream.


    Thursday, November 22, 2012

    Facebook Page

    A little bit of myself before I get to the point.

    I started baking at the age of 8. I know I should have been playing with my cooking toys or barbie dolls at that age but no I fell in love with the real thing. Mum never believed in my passion and love for baking at that time; I can't blame her for that. She would've thought I was fooling around. But my dad ,on the other hand, was the complete opposite. At the age of 10, he bought me a set of hand held mixers (which I insisted I wanted when I saw it at the electrical shop) because he realised I struggled beating the butter and sugar with a wooden spoon. And the journey began. 13 years down the road I am still using that very hand held mixer dad bought for me. I bought myself a stand mixer three years ago which I use as well. I can't wait till dad gets me a kitchenaid. I hope to take a diploma in pastry from Le Cordon Bleu in Paris in the next few years and open a dessert boutique & bar in the future. Hope all goes well. :)

    At the moment, to give myself an excuse to bake and improve ( secretly,to get extra pocket money too! =P ) myself, I've decided to take orders for my cakes,cupcakes & cookies only. Prices will vary.

    I started blogging my food journey only recently,maybe a year or so and started taking photographs as well. I am still learning and still not very good at it but I hope to get better as time goes. I post my pride and joy on my personal facebook page which I got a fair share of good and 'sarcastic' comments. Good comments have encouraged me to continue my baking and photography skills while the sarcastic ones have made me realised that there are friends who will definitely be envious and want to discourage me from doing what I love so I decided to created a facebook page for My.Vanilla.Sprinkles to share my pride and joy with everyone who support me!

    Please support me by liking my facebook page! Thank you!!:)


    Friday, November 16, 2012

    Happy Deepavali (Diwali)!!!

    HAPPY DEEPAVALI (DIWALI) !!!


    I finally got to celebrate deepavali after being away for 5 years. One thing wonderful about living in Malaysia, the country is multiracial and there are so many festivals to celebrate. While I was away in Sydney, you hardly feel the festive seasons like Eid, CNY & Deepavali. It's just another day in a foreign land. 

    Just a quick update on my blog which I have been neglecting because I have been so lazy to blog.

    I started a new job if I haven't mentioned it already here. I have join a Management Training Programme like sponsored by Maybank. I'm having an amazing time with amazing friends and people in FSTEP. 

    Since I started my training, I only had the weekends to bake my cookies and cakes so last Saturday was a mad day for me. I baked 5 different types of cookies in one day, it took me 15 hours to complete everything because there was a power supply cut for 3 hours. It was a frustrating 3 hours of waiting.Still I manage to cut my fruits and nuts for my sugee christmas cake for next year! 

    On Sunday, I baked one caramel cake which was a flop because I didn't bake it long enough as I was forced turn off the oven and attend an open house. Then I made macarons which was a flop as well. I almost broke down and wanted to give up. Batches of macaron batter were thrown out. I made my macarons twice and both were a flop, can you imagine? sigh... I never gave up and continued with my mini pear cupcakes. That,at least, turned out well. Made the buttercream for it, tried to savage a few of my macarons and fill them with raspberry buttercream then kept the remaining buttercream in the fridge for piping the next day. 

    On Monday, I got the courage to make my caramel cake again and this time I baked it longer. Final results were out of this world. I reassured myself Sunday was a jinxed day for me! I had to make myself happy lah!

    No recipes in this post because I didn't get to take individual pictures of my cookies & cakes. 


    Clockwise : coconut candy, caramel rainbow cake & mini pear cupcakes with  swiss buttercream dusted with cinnamon-vanilla powdered sugar, sugee (semolina) cornflakes cookies, pineapple jam tarts, cashewnut cookies, vanilla-orange semperit cookies, coffee-chocolate cookies coated in nestum.


    Chocolate macarons with Caramel buttercream

    I tried a different macaron recipe for a change because I find Italian meringue tricky to make. It works wonderfully sometimes for me and sometimes it turns out to be a disaster.So I tried looking for a different recipe and found a recipe off Kak Rima's blog  and this recipe uses the swiss meringue method. She had another one using the French meringue method but I chose this. Will definitely try the french meringue method as well soon.

    So what did I think of the making  macarons using the Swiss meringue method?
    I found it easier to handle compared to the italian meringue method. Kak Rima's recipe turned out fantastic. The most successful batch of macarons for me so far.


    Makes ~ 30 filled macarons

    Chocolate macaron recipe:
    180g  egg whites
    160g caster sugar

    180g sifted almond meal
    180g icing sugar,sifted
    20g dutch processed cocoa powder, sifted
    1. Prepare baking trays with parchment paper or silpat with macaron template sheet underneath.
    2. Preheat oven to 160 Celcius.
    3. Mix egg whites and caster in a bowl and place the bowl over a pot of simmering water(double boiler method) until sugar is melted and the mixture is really hot. Make sure you continuously stir the mixture. Temperature approx 50-55 Celcius.
    4. Remove from heat and using a stand mixer or hand held mixer, whisk mixture until medium peaks and slightly cooled down. Don't over beat the mixture. If you have accidentally over beat the mixture, you will have to throw it away and start all over again. (Speaking from experience. LOL!!)
    5. Mix the sifted almond meal,icing sugar and cocoa powder in a different bowl. Take a scoop of meringue and mix vigorously with the dry ingredients. Fold gently until combined the rest of the meringue in two batches.Make sure you have a shiny, glossy & slightly thicker than cake batter mixture.
    6. Scoop mixture in a disposable piping bag fitted with a 10mm plain nozzle. Pipe according to your macaron template and rap baking tray on a hard surface. Allow the surface of macaron to dry completely before baking it on the lowest rack for 15-20 minutes opening the oven door once during baking time.
    7. Allow to cool before removing macaron shells. Match the shells for piping.

    Allowing my macaron shells to form a skin under the air conditioner

    Almost perfect after baking!
    Caramel swiss meringue buttercream:
    50g egg whites
    90g caster sugar
    150g unsalted butter

    1 heaped tablespoon caramel, store bought or homemade ( will post a recipe in future )
    1. Mix egg whites and caster in a bowl and place the bowl over a pot of simmering water(double boiler method) until sugar is melted and the mixture is really hot. Make sure you continuously stir the mixture. Temperature approx 50-55 Celcius.
    2. Remove from heat and using a stand mixer or hand held mixer, whisk mixture until medium peaks and cooled down but not too cold.
    3. Add butter cubes gradually, making sure butter has fully incorporated after each addition. Add caramel and mix until combined.
    4. If your buttercream doesn't have a pliable consistency, put in the fridge for 15-30 minutes until it firms up a bit.  
    5. Scoop buttercream in a piping bag fitted with a plain nozzle.
    Assemble:
    1.  Pipe one macaron shell in each pair with buttercream then cover with the other macaron shell then twist the macarons slightly. Place in fridge for 24 hours to mature.
    Macaron shells were matched and piped with caramel buttercream
    Notes:
    • Air con dry it for 15-30 minutes.
    • Make sure meringue is glossy and shiny.
    • To prevent browning for coloured macaron shells, place an empty tray on the top shelf.
    • When baking, have another same size baking pan on the bottom on macarons' baking pan.


    viola~