So I decided to make another cake over the weekend for my father since the first one was a complete disaster with the help of my cousin, of course, who just completed her PMR and she got straight As!! So proud of her!! Congratulations Saras!!!! |
| My proud achievement! |
 |
| For the first time after God knows how many attempts of macarons, my macarons have turned out well!!! |
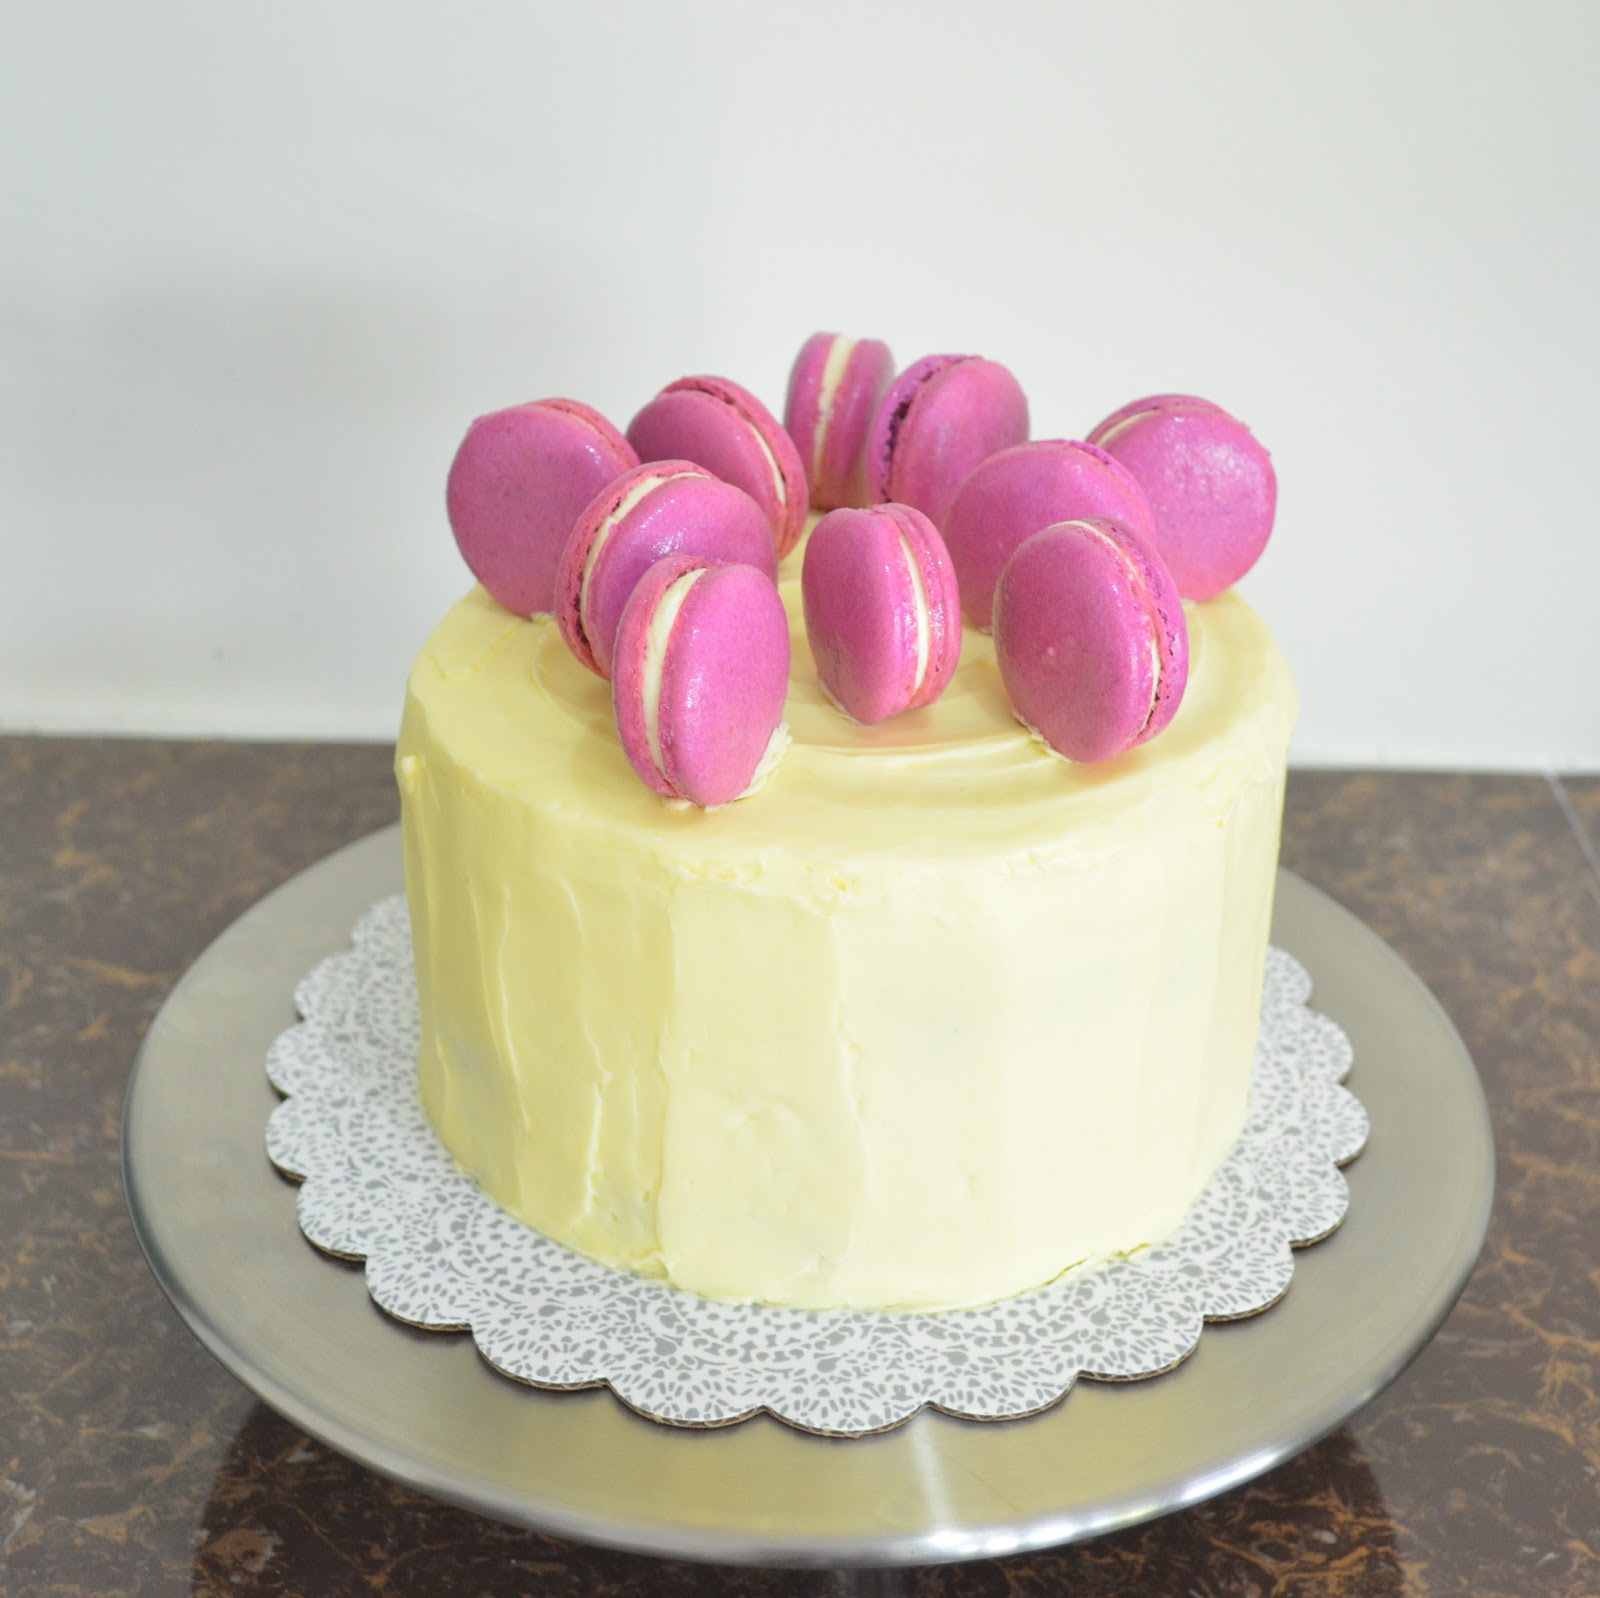 |
| It was definitely a very beautiful cake and it tasted very good as well. I love the combination of white chocolate and rose. Only thing I would not do again is putting too much colouring to the cake cause the bottom layer cake tasted pretty bad compared to the first layer. |
White chocolate cake:
2 cups cake flour
1 cup plain flour
1 tablespoon baking powder
1 teaspoon baking soda
a big pinch salt
250g unsalted butter
1 3/4 cups + 3tablespoons caster sugar
1 teaspoon vanilla extract
1 large egg
1 1/4 cups ice cold water
100g white chocolate, melted & cooled
3 large egg whites, room temperature
Food colouring of your choice, I used Royal Blue from Americolor
- Beat butter and 1 3/4 cups of sugar for 10 minutes until very light and fluffy.
- Add egg and vanilla extract.Mix well.
- Add melted chocolate and continue mixing.
- Alternate the dry ingredients and cold water until well combined.
- In a different bowl, whisk egg whites until frothy. Gradually add the remaining 3 tablespoons of sugar in three batches until Soft peaks.
- Fold into the cake batter.
- If you want to make a 4 stack cake with different colours like I did, weigh the cake batter equally and squeeze the desired amount of colouring into your cake batter.
- Pour cake batter into 3-4 8 inch round pans line and grease with butter and parchment paper.
- Bake for 30-45 minutes in a preheated oven of 180 C.
- Half way through baking time, if browning too quickly, cover cake with aluminium foil.
- Remove from oven and allow cakes to cool completely in baking pan before removing it.
- Wrap with clingwrap and place layers in fridge overnight.
White chocolate & Rose swiss meringue buttercream:
300g egg whites
500g caster sugar
600 - 700g unsalted butter,chilled cubes
1 1/2 teaspoons rose essence
200g white chocolate, melted & cooled
- Melt chocolate over double boiler and allow to cool completely.
- In heatproof bowl, place egg whites and caster sugar over a pot of water over medium heat.( Double boiler) Whisk occasionally until sugar as completely dissolved.This may take a while.
- Using hand held or stand mixer, whisk the mixture on medium-high speed until mixture becomes marshmallowy and cooled down.
- Touch meringue to feel the temperature.
- Add butter cubes,one at a time,and mixing it well after each addition.
- If mixture looks runny, Place in the fridge for about 15-30minutes, depending on how warm the meringue is.Remove from fridge and continue to beat until you get a nice creamy mixture.
- If mixture looks good, just continue mixing until you get a creamy mixture, it may look curdled in the beginning but it will start looking better as you continue beating.
- Add cooled white chocolate and rose essence.Give it a good quick whip again.
Macaron shells:
80g sifted almond meal
100g icing sugar
80g egg whites
65g caster sugar
Food colouring of your choice
- Prepare baking trays with parchment paper or silpat with macaron template sheet underneath.
- Preheat oven to 160 Celcius.
- Mix egg whites and caster in a bowl and place the bowl over a pot of simmering water(double boiler method) until sugar is melted and the mixture is really hot. Make sure you continuously stir the mixture. Temperature approx 50-55 Celcius.
- Remove from heat and using a stand mixer or hand held mixer, whisk mixture until medium peaks and slightly cooled down. Don't over beat the mixture. If you have accidentally over beat the mixture, you will have to throw it away and start all over again. (Speaking from experience. LOL!!)
- Mix the sifted almond meal and icing sugar in a different bowl. Take a scoop of meringue and mix vigorously with the dry ingredients. Fold gently until combined the rest of the meringue in two batches.Make sure you have a shiny, glossy & slightly thicker than cake batter mixture.
- Scoop mixture in a disposable piping bag fitted with a 10mm plain nozzle. Pipe according to your macaron template and rap baking tray on a hard surface. Allow the surface of macaron to dry completely before baking it on the lowest rack for 15-20 minutes opening the oven door once during baking time.
- Allow to cool before removing macaron shells. Match the shells for piping.
For the filling:
I used the same buttercream I used for the cake.
Notes:
- Air con dry it for 15-30 minutes.
- Make sure meringue is glossy and shiny.
- To prevent browning for coloured macaron shells, place an empty tray on the top shelf.
- When baking, have another same size baking pan on the bottom on macarons' baking pan.
Assembling notes:
- I used about 1 1/2 cups of buttercream for each layer but I think 3/4 cup of buttercream is sufficient.
- I crumb coated my cake and kept it in the fridge overnight before doing the final touches.
- The next day I found it difficult to frost the cake again cause the buttercream kept sliding off. I realised the crumb coat had condensation water on the cake so I carefully place a tissue to absorb the water. It worked. Then I did the final touches.
- Before placing the macarons on top,allow the cake to sit on the benchtop for a couple of minutes before arranging the macarons.
 |
| Layering |
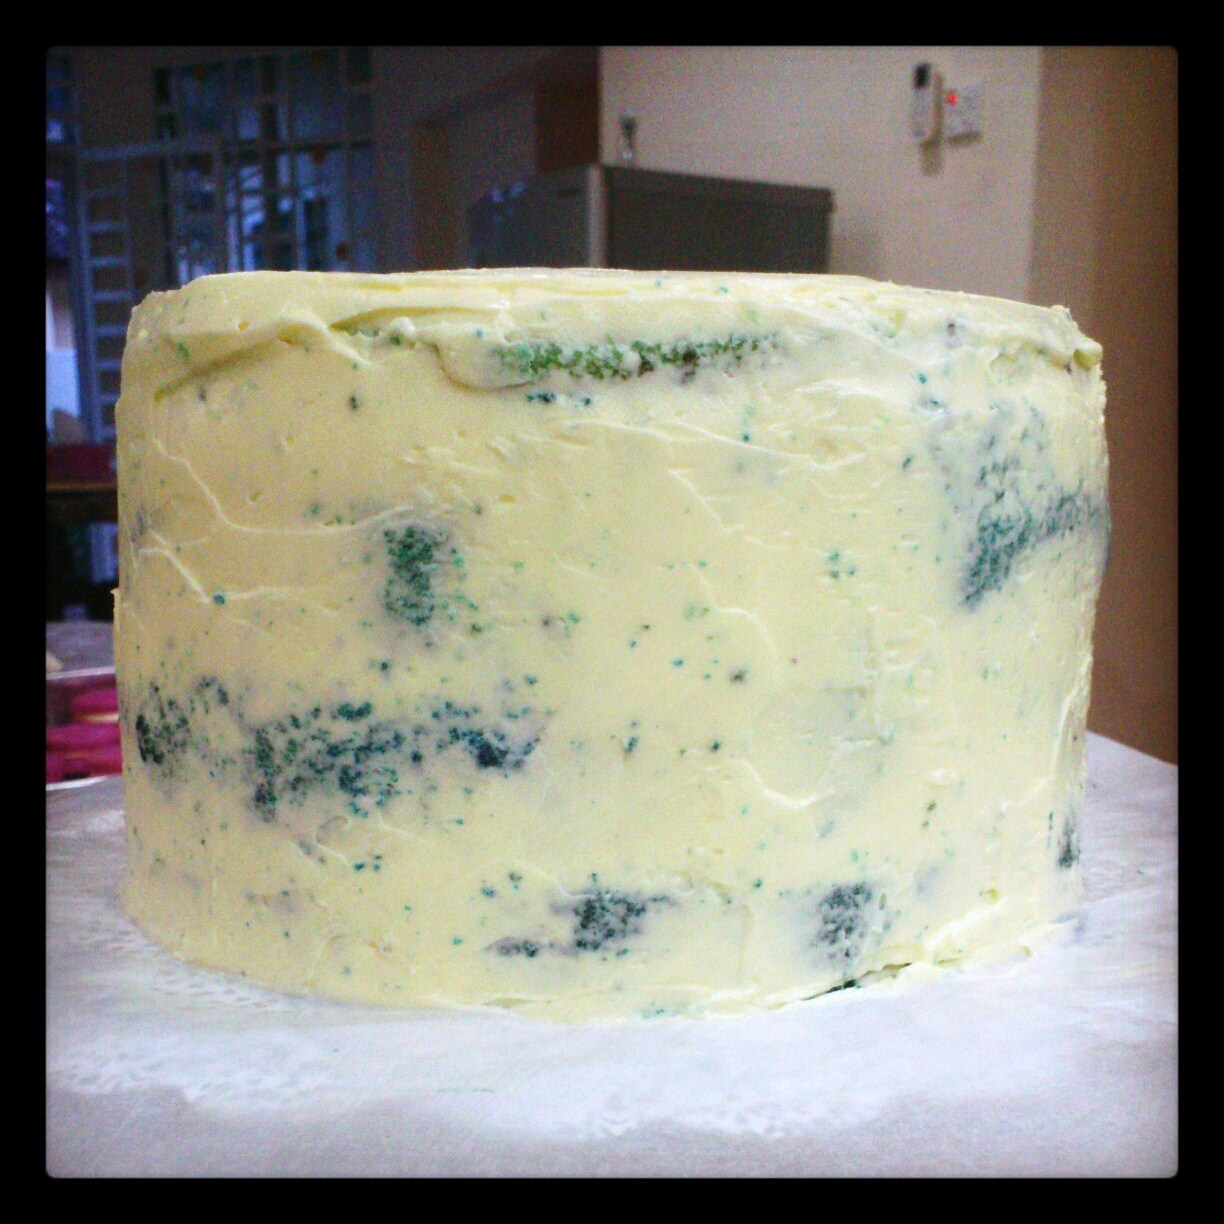 |
| Crumb Coat done! |
 |
| Had it crumb coated the night before. |
 |
| The King of My Heart |

 |
 |
| I honestly wouldn't have done it without her!!! <3 |
 |
| <3 |

No comments:
Post a Comment